Our log home situated on 40 acres in Montana and the move from the East coast was a childhood dream come true, and a labour of love. It quickly became apparent that there is much more variety than one would ever think. Not only do log homes come in all shapes and sizes, but the logs themselves come in as many variations as you can imagine.
There are two categories of log homes: handcrafted and milled log homes. Initially, you may not realize what you are looking at, but there are some basic guidelines that will clarify the differences. A handcrafted log home is just that; the logs are peeled by hand, notched by hand, and in many cases, each log is scribed to fit exactly on top of another log. In many handcrafted homes, the logs are stacked alternately, so the large end of a log is stacked on top of the tapered end of the log beneath. A milled log home will feature logs that are uniform in shape, and the logs will be cut to fit together, such as with a tongue-and-groove or Swedish cope, so that they stack easily and evenly. This is what we chose and alas, The Fish Creek House was born. There is a big price difference between a handcrafted and a milled log home. This is mostly because of the intense labor required to construct a handcrafted home, and because of the larger diameter logs that are normally used. The vast majority of homes built today are milled log homes.
If you see a log home with round logs and chinking, that is a first indication that this is could be a handcrafted log home. Chinking was historically a mortar-like material that filled the gaps between the logs. Modern science has created an acrylic compound that expands and contracts with the wood; it is applied as a wide white stripe. If a handcrafted log is not scribed, then chinking is a must because the logs leave gaps along their length. We've chinked interior and exterior... vastly extending the life as well as the beauty of the logs.
On milled logs, there are many joinery systems to choose from. Today, the most popular joinery is called a "Swedish cope". This is where each log is scooped out to fit snugly on the curve of the log beneath. It gives a very smooth and natural look. This is what we choose. Another joinery system is the tongue-and-groove, or double tongue-and-groove depending on the manufacturer. The tongues are cut into the top of the log and corresponding grooves at the bottom. These create a tight fit and stack easily. A more traditional, early American notch is called the dove-tail, which is a mortise and tenon notch usually cut into squared timbers. There are many other corner systems available, but these are the most commonly used
The characteristic corner of your log home will speak volumes to the person who knows how to read it.
A milled log that is saddle-notched will stack the same way (of course, every log will look exactly the same). Because saddle-notched logs are staggered, course to course, the log ends will be visible on the interior corners of the house as well as the exterior. This gives a very rustic look. A butt-and-pass corner gives you an end where there is a space between every other log. This is because one log butts up against the intersecting log, which runs past it. These logs are all laid on the same course, so that with the interior corners of your home, the logs will come to a squared edge.
The shape, or profile of the log is another feature which helped us decide what kind of package to purchase. Many people prefer a "D" log, which is round on the outside and flat on the inside. This gives you a horizontal wood-paneling look, and is easy to hang pictures on. Others prefer a round log, which is a little more rustic and presents many challenges - such as how to join the logs to the sheetrock. Squared timbers, which give a more Appalachian look to the home, tend to be tall and fairly narrow, and are often grooved for the application of chinking.
The average milled log home will use pine logs in 6" and 8" diameters. You can also find them in 10" and 12" diameters. Anything larger than 15" will probably roll you over to a handcrafted home. Cedar logs are an upgrade, and can be found in 6", 8" and occasionally 10" diameters. Some manufacturers more rarely use oak, cypress, fir, hemlock, larch, poplar, spruce, and walnut. These rarer woods will be a price upgrade. Because of the superior log care products on the market today that protect all the logs effectively, the wood species largely becomes a matter of personal taste. The best rule of thumb when choosing log species is to stay with a wood that is native to your area. The logs will adapt to the environment more comfortably.
In contrast to other building materials, wood "breathes." This means that it is open for diffusion in both directions, because billions of tiny cells ensure there is an on-going renewal of the air molecules in the inner room. At the same time, the surface temperature of wooden elements in the inner rooms of the building is always similar to the corresponding room air temperature and, therefore, always pleasant for the people living there. The log walls regulate humidity by absorbing moisture and discharging it again when the outer conditions change. The electrostatic properties of wood mean that it does not get charged up with static electricity causing minimal dust to be whirled around in the rooms
Newcomers are continually amazed to discover that the logs are their own insulation. To compare a stick-frame wall to a log wall by using the "R-value" is not comparing "apples to apples". Logs have a lower "R-value" than insulated 2x4 walls. However, they work on the principal of thermal mass. Because of the cellular structure of logs, they tend to absorb the heat and hold it longer than traditional walls. The logs will actually absorb the heat from the interior of the house (or from the sun, if facing south), and when the temperature drops at night, the walls will generate that heat back into the house until the temperatures equalize. They take longer to warm up, and stay warm much longer. Conversely, they stay cooler in the summertime. Here in Montana, we turn the air conditioner on by opening another window!
Some producers feature a half-log system, where the logs are attached outside-and-inside to 2x4 or 2x6 stick-frame walls. This adds the extra R-value of an insulated wall, along with the beauty of the log, and also makes it easier to install electrical wiring. Ultimately, these systems are a bit more expensive than full-log, because of the additional cost of the lumber. But they do give the added ability to vary the interior of your house, so that some interior walls could be sheetrock, stone, or tongue-and-groove. In any case, many modern manufacturers use the half-log system on their second floor, to compensate for the huge windows, which may displace so many logs that the wall's integrity could be compromised. Also, because the large windows settle at a different rate than logs, the stick-framed second floor equalizes the overall settling. With the best manufacturers, you won't be able to tell on the outside where the full logs end and the half logs begin.
It would save a lot of work for the buyer to get a "turnkey" price on the logs, the lumber, the windows and doors, and the roof - what is commonly known as a "weathered-in shell". However, this complete system only makes sense if you are local to the manufacturer; otherwise, you'll be spending thousands of dollars to ship ordinary lumber across the country. After all, there is no difference between a roof used on an ordinary house and a roof used on a log home. You choose the kind of roof you want, but it'll come from the same manufacturer. The same goes for the floors, the doors, the kitchen, and the heating system. Windows can be a little tricky; you'll have to find a manufacturer that is willing to make a extended window-sill (or jamb) to accommodate the thickness of the logs. Most major window companies are able to do this.
Remember that log homes are completely custom. No log home company will offer you a choice of kitchens or bathrooms like a development builder. You will have to shop for these yourself, and the possibilities are limitless. Your builder may make some decisions for you, but you will be better served to pick your own flooring, light fixtures, faucets and even door knobs. Most manufacturers do not want to have anything to do with the foundation; that is not their business. You can use any kind of foundation you want, but you'll need to contact a local contractor to do that job, or have your builder do so.
Log homes are not maintenance-free - nor are they overwhelmingly laborious. Although the products on today's market do a fantastic job of protecting the logs from sun, rain and insects, they do need to be re-applied ever three to five years depending on the wall exposure. This "maintenance coat" is much easier to apply than the original coats of stain, and no, you don't have to strip off the old coat first. So it's not as bad as it sounds! However, you must inspect the logs at least once a year for excessive cracking (or checking) - especially when the check opens upward, creating a water trap.
Log homes bring all of the beauty of the outdoors into your home.. ahh the makings of Montana memories...
marți, 1 februarie 2011
When Purchasing the Lay of the Land... Or Home on the Range
It doesn't take long to realize that finding the right piece of property is the most important aspect of new home construction. In a development, restrictions and easements have already been sorted out, but if you are looking for a stand-alone piece of vacant land, you're on your own. With the move to Montana, we got a fast education on what tolook for and be aware of.Here are some of the factors you need to consider before spending your hard-earned cash on a pretty view that might be unbuildable.
THE PERC. No, we're not talking about coffee. But we are talking about percolate. If you are outside of a community, chances are that you will not be connected to city water and sewer; you will have to build a septic system for your own house. See that story or rather saga in another post here. The septic system will be designed by a local civil engineer and probably approved by the county, but before the engineer knows what kind of septic you need he'll have to take a Perc Test. They will dig a big hole in the ground, fill it with water, then clock how long it takes for the water to seep into the ground. If the water drains too fast, you have too much sand. If it drains too slow, you have too much clay (or probably rock). There is an acceptable tolerance, outside of which the perc fails. Any wise buyer will make the purchase of the land contingent on the perc. Don't assume that just because you have a big piece of land that it will perc somewhere; this is not necessarily the case. The cost of the test is usually paid by the buyer. However, a motivated seller will perc the land for you, or even offer an approved septic system. This is a big bonus, and adds peace of mind, but the land will be more expensive as a result. In the long run, it's worth the extra dollars to bypass this big hurdle. The septic system will be designed to accommodate the number of bedrooms in a house, and you cannot add any bedrooms without redesigning the system, again we found out and added another septic tank for bed and breakfast.
Once the land is perced, that hole is the spot where the septic will be installed. If it's in the front yard, you cannot change the location without doing another perc. Also remember that nothing can be built on top of your septic field, nor can you plant any trees there.
SETBACKS: This is the space between the property line and the building, defined by the township. Nothing can be constructed in the setback, including your driveway. Some townships require more than 100 feet of setback from the road; setbacks on the front and back perimeters are usually larger than those on the sides of your property. On your survey, a dotted line usually defines the setback, and the space inside is called the building envelope. If the footprint of your intended house and driveway is wider than the setbacks allow, you may have to apply for a variance, or change the orientation of the building.
EASEMENTS: Easements are the rights given to other named parties for public or private use of a stretch of your land. This may include a gas main that runs through your property, power lines, railroad tracks, water mains, or a strip leading to a land-locked neighbor (this strip would be the "flagpole" of a flag lot). This easement should be clearly delineated in the deed, although common usage has been known to claim precedence over perceived rights. If you're the one who requires this easement for a flag lot, make sure it is in writing before you purchase this land, or you might not be able to access it. Fortunately we have both good easements and neighbors so we can ride our horses pretty much anywhere here.
DEED RESTRICTIONS: These restrictions can be imposed by the former owner of the property, or the township depending on application. For instance, you might be limited as to what kind of house you can build; or what materials you can use. You might not be allowed to build a log home. Some restrictions limit the square footage of the house, or the use of the property. You may have to limit the height of your house, or even what type of fencing you can use. There might be a limit to the kind of livestock you can manage, or how many acres per horse. This has nothing to do with zoning, which is a separate issue.
MINIMUM ACREAGE: Townships have started battling urban scrawl by imposing minimum acreage on a building lot. Sometimes, the piece of land you are trying to buy is smaller than the minimum acreage. If the lot was subdivided before the law was passed, it is usually considered "grandfathered" and you should be able to build on it. Check with the authorities to be sure; you may have to obtain a variance to build on a "substandard" sized lot. Also, if you are purchasing a big piece of land with the assumption that you can subdivide later and sell off parcels, make
CLEAR TITLE: This is a b iggie... If there is a lien on a property due to non-payment of bills or taxes, the title will be considered clouded and you might not be able to obtain clear title to your piece of land. There may be disputes about boundary lines, or adverse possession if you have an unwelcome long-term squatter. In most cases, a thorough title search will uncover any irregularities, and the mortgage company will require that you purchase a one-time title insurance policy against any future issues.
WATER SOURCE: If you need to dig a well, consult with the local well driller. There's a pretty good chance that the driller will have a good idea about how deep he'll need to go. You will pay by the foot to drill a well, and it could add thousands to your budget. Ah, we love the well water...
In short, from our experience, when it comes to purchasing land, you must thoroughly investigate your property with the township, civil engineers, or land use lawyers, no one else is going to protect you. A cooperative township office will give you access to the public records relating to your piece of land; if it's been perced in the past, those records become public. They may already have a file about your lot and block number, and a trip to the township office may enlighten you if there have been problems in the past. At the very least, you should have an idea what you can and cannot do with your land, before you make that big commitment
What's Cooking at the Fish Creek House
That's a question frequently asked of us as the innkeepers of the Fish Creek House B&B. Here's a couple of breakfasts that are favorites of guests.
One Pan Breakfast
We often have impromptu overnight guests, My husband,Dan, made this easy all-in-one breakfast. It was a success. Now these guests request this dish whenever they come to visit. A hearty breakfast guaranteed to fuel whatever Montana adventures you choose. Enjoy!
INGREDIENTS
1 pound bulk pork sausage
4 large potatoes, peeled, cooked and cubed
1 large onion, chopped
6 eggs, beaten
6 slices process American cheese
Salt and pepper to taste
Directions
In a large skillet, brown and crumble sausage; add potatoes and onion. Cook over medium-high heat for 18-20 minutes or until potatoes are browned. Gradually stir in eggs; cook and stir until set. Remove from the heat; top with cheese. Season with salt and pepper. Yield: 4-6 servings.
Fish Creek Trout Breakfast
SERVES 4
Two of the rewards of rising early at The Fish Creek House the thrill of the catch for anglers, the pleasure of fresh-caught trout, and coffee for all.
4 thick slices bacon
4 8-10 oz. trout, cleaned, heads and tails on
1 cup yellow cornmeal
Salt and pepper
1/3 cup vegetable oil
1. Fry bacon in a large, heavy skillet until brown and crisp, about 15 minutes. Drain on paper towels and set aside. Reserve bacon fat in pan.
2. Rinse fish and dredge in cornmeal. Salt and pepper both sides to taste. Add vegetable oil to the bacon pan. Heat the pan until very hot, then fry fish in oil and fat for about 5 minutes. Carefully turn the fish (a wide, long spatula is ideal for the task), then cook the other side. Shake the pan frequently to ensure that the fish doesn't stick. Trout should be golden and crisp on the outside, moist and tender inside. (If your pan is too small, cook fish in batches and keep warm in a low oven.) Serve 1 trout per person, garnished with bacon.
One Pan Breakfast

We often have impromptu overnight guests, My husband,Dan, made this easy all-in-one breakfast. It was a success. Now these guests request this dish whenever they come to visit. A hearty breakfast guaranteed to fuel whatever Montana adventures you choose. Enjoy!
INGREDIENTS
1 pound bulk pork sausage
4 large potatoes, peeled, cooked and cubed
1 large onion, chopped
6 eggs, beaten
6 slices process American cheese
Salt and pepper to taste
Directions
In a large skillet, brown and crumble sausage; add potatoes and onion. Cook over medium-high heat for 18-20 minutes or until potatoes are browned. Gradually stir in eggs; cook and stir until set. Remove from the heat; top with cheese. Season with salt and pepper. Yield: 4-6 servings.
Fish Creek Trout Breakfast

SERVES 4
Two of the rewards of rising early at The Fish Creek House the thrill of the catch for anglers, the pleasure of fresh-caught trout, and coffee for all.
4 thick slices bacon
4 8-10 oz. trout, cleaned, heads and tails on
1 cup yellow cornmeal
Salt and pepper
1/3 cup vegetable oil
1. Fry bacon in a large, heavy skillet until brown and crisp, about 15 minutes. Drain on paper towels and set aside. Reserve bacon fat in pan.
2. Rinse fish and dredge in cornmeal. Salt and pepper both sides to taste. Add vegetable oil to the bacon pan. Heat the pan until very hot, then fry fish in oil and fat for about 5 minutes. Carefully turn the fish (a wide, long spatula is ideal for the task), then cook the other side. Shake the pan frequently to ensure that the fish doesn't stick. Trout should be golden and crisp on the outside, moist and tender inside. (If your pan is too small, cook fish in batches and keep warm in a low oven.) Serve 1 trout per person, garnished with bacon.
Life's Short .. Eat Dessert First
Blueberry Cream Cheese French Toast
For weekend brunch guests , we like to be just a touch extravagant. We made this for Saturday brunch recently and it was fabulous. Best of all, it was quick and easy. We used blueberries for this recipe. Try your favorite berries—maybe strawberries or raspberries. If you feel adventuresome, try puréed apricots, mangoes, or wherever your imagination takes you.
The bread shown in this picture is Knobby Apple Cinnamon Bread which makes fabulous French toast—with or without the filling. In a sweeter bread like this, don't put too much filling in your toast so that it is not overwhelming.
1 eight-ounce package of cream cheese
2 tablespoons sugar
1 1/2 cup fresh or frozen blueberries
1 teaspoon vanilla extract
4 large eggs
1/4 cup milk
1/4 teaspoon nutmeg
8 slices of bread
Directions
1. In a blender, mix the cream cheese, sugar, berries, and extract.
2. In a flat dish, mix the eggs, milk, and nutmeg.
3. Spread the filling between two slices of bread as if making a sandwich. Place the sandwich in the egg mixture, let it soak for a moment, and then repeat on the other side.
4. Cook on a hot grill as for French toast. The temperature should be slightly lower than normal to allow the heat to penetrate to the filling.
Serve with fresh berries and a dollop of filling on top of the toast.

Morning is for Muffins
Blueberry and Currant Muffins
Waking up early to whip up these muffins for our guests
makes 12 to 16 medium muffins
3 cups flour
3/4 cup cane sugar
1 1/2 T baking powder
1 1/2 t salt
1/2 cup honey
4 eggs
1 T vanilla extract
1 t orange zest
8 T (1 stick) unsalted butter*, melted
1 pint fresh or frozen blueberries
1 pint fresh currants
*I’ve stopped using store-bought butter. Instead, I just use heavy cream and whip it up in my mixer, past the whipped cream stage, until it becomes thick and the palest yellow. It’s really easy, tastes great, and lets you control the amount of salt.
Start by removing the current berries from their stems.
Preheat the oven to 375F. If not using silicone, use a bit of butter to grease the sides of the muffin tin.
Sift the flour, sugar, baking powder and salt together into a bowl and set aside.
In another bowl (if you are using a mixer, use that bowl), combine the eggs, vanilla, honey, orange zest and milk, and whisk for about a minute. Add the dry ingredients and mix on low for about 2 minutes or until the dry ingredients are just incorporated. Don’t over mix.
Start slowly drizzling in the butter, continuing to slowly mix. When all the butter is well incorporated (no visible butter streaks), fold in the berries with a spatula. Try not crush them.
Fill each cup of the muffin tin to the top, carefully wiping off any spillage from the top of the pan. Place in the middle rack of the oven, and bake for about 25 minutes, or until golden brown and a skewer inserted into the middle of the middle muffin comes out clean.
Allow to cool in the pan for about 5 minutes, and then gently loosen the sides with a knife or fork, and turn the whole pan over to remove the muffins. Allow them to cool a few more minutes on a wire rack
The Sweet Smell of Strawberry Success
Probably nothing beats the taste of a just-picked, sun-ripened strawberry. Strawberries are loaded with natural sugars, but these sugars rapidly convert to starch once the berry is picked. Strawberries can be grown in a greenhouse year-round, but not without a little help from you . Owning a greenhouse has been a way of providing our guests here at the Fish Creek House B&B with quality, fresh and mostly organic fruits and vegetables.
Strawberry Bread
(makes 2 loaves)
3 cups flour
1 teaspoon baking soda
1/2 teaspoon salt
1-1/2 teaspoon cinnamon
2 cups sugar
4 eggs, beaten
1-1/4 cup vegetable oil
2 cups fresh chopped strawberries
1 cup chopped walnuts
In large bowl, combine first 5 ingredients. Add egg and oil; mix well. Stir in berries and nuts until evenly distributed - batter will be thick. Grease & flour two 9" loaf pans and divide batter evenly into each. Bake at 350 approx. 1 hour. Cool in pans for 10 minutes. Invert onto wire rack to cool completely.

And of course, being a native New Yorker, cant resist whipping this up Montana style for breakfast or brunch
Big Apple Pancake Montana Style
4 tablespoons butter
1 large Golden Delicious apple, peeled, cored, and cut into 1/4" slices
1/2 cup milk
1/2 cup all-purpose flour
1/2 teaspoon cinnamon
4 large eggs
3 tablespoons sugar
1/2 teaspoon vanilla extract
1/4 teaspoon salt
2 teaspoons confectioners' sugar to dust when done
Preheat oven to 450
Melt butter in 11" oven proof skillet over medium heat, then transfer 2 tablespoons to a blender. Add apple wedges to skillet and cook, turning over once, until beginning to soften, 3 to 5 minutes.
While apples are cooking, add milk, flour, cinnamon, eggs, sugar, vanilla, and salt to butter in blender and blend until smooth.
Pour batter over apple and place skillet in the oven. Bake until pancake is puffed and golden, about 15 minutes. Sift confectioners sugar over the top and serve.
And of course, always appropriate for breakfast... a "justifiable" dessert, and pretty much a regular here.
Danish Pastry
Ingredients:
¼ cup warm water,
2½ tsp dry yeast
½ cup milk, room temperature
1 egg, room temperature
¼ cup sugar
1 tsp salt
2½ cups AP flour
8 ounces unsalted butter, cold, cut into ¼-inch thick slices
Danish fillings of choice
Directions:
In a large bowl, sprinkle yeast over the water.
Allow to stand for 5 minutes, until yeast begins to froth.
Add milk, egg, sugar and salt.
Set aside.
In another large bowl, cut the butter into the flour using a pastry cutter or two knives. Alternatively, you can also use a food processor: Put flour into food processor, add butter and pulse (8-10 times) until butter is cut into pieces 1/2 inch diameter- no smaller.
Empty contents of food processor/bowl into the bowl with the yeast mixture.
Very gently turn the mixture over with a rubber spatula until the dry ingredients are moistened.
Cover bowl and refrigerate overnight (or up to 4 days).
Lightly flour work surface, turn the dough out and lightly flour the dough.
Pat into a rough square.
Note: If at anytime the dough becomes too soft, cover with plastic and chill for 15-20 minutes.
Note 2: I rolled out my dough as best I could, so I didn’t use the following measurements, but you can if you’d like a guide.
Roll out to 16" x 16".
Fold in thirds like a business letter and turn so that the closed fold is on your left.
Roll again to 10" x 24".
Fold in thirds again, turn so the closed fold is on your left.
Roll into a 20" x 20" square.
Fold the square in thirds and turn so that the closed fold is on your left.
Roll into a 10" x 20' rectangle, fold in thirds again.
Wrap dough in plastic and chill at least 30 minutes (up to 2 days).
Dough can be frozen for 1 month.
Thaw in refrigerator overnight.
For weekend brunch guests , we like to be just a touch extravagant. We made this for Saturday brunch recently and it was fabulous. Best of all, it was quick and easy. We used blueberries for this recipe. Try your favorite berries—maybe strawberries or raspberries. If you feel adventuresome, try puréed apricots, mangoes, or wherever your imagination takes you.
The bread shown in this picture is Knobby Apple Cinnamon Bread which makes fabulous French toast—with or without the filling. In a sweeter bread like this, don't put too much filling in your toast so that it is not overwhelming.
1 eight-ounce package of cream cheese
2 tablespoons sugar
1 1/2 cup fresh or frozen blueberries
1 teaspoon vanilla extract
4 large eggs
1/4 cup milk
1/4 teaspoon nutmeg
8 slices of bread
Directions
1. In a blender, mix the cream cheese, sugar, berries, and extract.
2. In a flat dish, mix the eggs, milk, and nutmeg.
3. Spread the filling between two slices of bread as if making a sandwich. Place the sandwich in the egg mixture, let it soak for a moment, and then repeat on the other side.
4. Cook on a hot grill as for French toast. The temperature should be slightly lower than normal to allow the heat to penetrate to the filling.
Serve with fresh berries and a dollop of filling on top of the toast.

Morning is for Muffins
Blueberry and Currant Muffins
Waking up early to whip up these muffins for our guests
makes 12 to 16 medium muffins
3 cups flour
3/4 cup cane sugar
1 1/2 T baking powder
1 1/2 t salt
1/2 cup honey
4 eggs
1 T vanilla extract
1 t orange zest
8 T (1 stick) unsalted butter*, melted
1 pint fresh or frozen blueberries
1 pint fresh currants
*I’ve stopped using store-bought butter. Instead, I just use heavy cream and whip it up in my mixer, past the whipped cream stage, until it becomes thick and the palest yellow. It’s really easy, tastes great, and lets you control the amount of salt.
Start by removing the current berries from their stems.
Preheat the oven to 375F. If not using silicone, use a bit of butter to grease the sides of the muffin tin.
Sift the flour, sugar, baking powder and salt together into a bowl and set aside.
In another bowl (if you are using a mixer, use that bowl), combine the eggs, vanilla, honey, orange zest and milk, and whisk for about a minute. Add the dry ingredients and mix on low for about 2 minutes or until the dry ingredients are just incorporated. Don’t over mix.
Start slowly drizzling in the butter, continuing to slowly mix. When all the butter is well incorporated (no visible butter streaks), fold in the berries with a spatula. Try not crush them.
Fill each cup of the muffin tin to the top, carefully wiping off any spillage from the top of the pan. Place in the middle rack of the oven, and bake for about 25 minutes, or until golden brown and a skewer inserted into the middle of the middle muffin comes out clean.
Allow to cool in the pan for about 5 minutes, and then gently loosen the sides with a knife or fork, and turn the whole pan over to remove the muffins. Allow them to cool a few more minutes on a wire rack
The Sweet Smell of Strawberry Success

Probably nothing beats the taste of a just-picked, sun-ripened strawberry. Strawberries are loaded with natural sugars, but these sugars rapidly convert to starch once the berry is picked. Strawberries can be grown in a greenhouse year-round, but not without a little help from you . Owning a greenhouse has been a way of providing our guests here at the Fish Creek House B&B with quality, fresh and mostly organic fruits and vegetables.
Strawberry Bread
(makes 2 loaves)
3 cups flour
1 teaspoon baking soda
1/2 teaspoon salt
1-1/2 teaspoon cinnamon
2 cups sugar
4 eggs, beaten
1-1/4 cup vegetable oil
2 cups fresh chopped strawberries
1 cup chopped walnuts
In large bowl, combine first 5 ingredients. Add egg and oil; mix well. Stir in berries and nuts until evenly distributed - batter will be thick. Grease & flour two 9" loaf pans and divide batter evenly into each. Bake at 350 approx. 1 hour. Cool in pans for 10 minutes. Invert onto wire rack to cool completely.

And of course, being a native New Yorker, cant resist whipping this up Montana style for breakfast or brunch
Big Apple Pancake Montana Style
4 tablespoons butter
1 large Golden Delicious apple, peeled, cored, and cut into 1/4" slices
1/2 cup milk
1/2 cup all-purpose flour
1/2 teaspoon cinnamon
4 large eggs
3 tablespoons sugar
1/2 teaspoon vanilla extract
1/4 teaspoon salt
2 teaspoons confectioners' sugar to dust when done
Preheat oven to 450
Melt butter in 11" oven proof skillet over medium heat, then transfer 2 tablespoons to a blender. Add apple wedges to skillet and cook, turning over once, until beginning to soften, 3 to 5 minutes.
While apples are cooking, add milk, flour, cinnamon, eggs, sugar, vanilla, and salt to butter in blender and blend until smooth.
Pour batter over apple and place skillet in the oven. Bake until pancake is puffed and golden, about 15 minutes. Sift confectioners sugar over the top and serve.
And of course, always appropriate for breakfast... a "justifiable" dessert, and pretty much a regular here.
Danish Pastry

Ingredients:
¼ cup warm water,
2½ tsp dry yeast
½ cup milk, room temperature
1 egg, room temperature
¼ cup sugar
1 tsp salt
2½ cups AP flour
8 ounces unsalted butter, cold, cut into ¼-inch thick slices
Danish fillings of choice
Directions:
In a large bowl, sprinkle yeast over the water.
Allow to stand for 5 minutes, until yeast begins to froth.
Add milk, egg, sugar and salt.
Set aside.
In another large bowl, cut the butter into the flour using a pastry cutter or two knives. Alternatively, you can also use a food processor: Put flour into food processor, add butter and pulse (8-10 times) until butter is cut into pieces 1/2 inch diameter- no smaller.
Empty contents of food processor/bowl into the bowl with the yeast mixture.
Very gently turn the mixture over with a rubber spatula until the dry ingredients are moistened.
Cover bowl and refrigerate overnight (or up to 4 days).
Lightly flour work surface, turn the dough out and lightly flour the dough.
Pat into a rough square.
Note: If at anytime the dough becomes too soft, cover with plastic and chill for 15-20 minutes.
Note 2: I rolled out my dough as best I could, so I didn’t use the following measurements, but you can if you’d like a guide.
Roll out to 16" x 16".
Fold in thirds like a business letter and turn so that the closed fold is on your left.
Roll again to 10" x 24".
Fold in thirds again, turn so the closed fold is on your left.
Roll into a 20" x 20" square.
Fold the square in thirds and turn so that the closed fold is on your left.
Roll into a 10" x 20' rectangle, fold in thirds again.
Wrap dough in plastic and chill at least 30 minutes (up to 2 days).
Dough can be frozen for 1 month.
Thaw in refrigerator overnight.
Better Breakfast Ideas An Unprecedented Opportunity for Creativity
Better breakfast ideas and menus are constantly on the table so to speak here at the Fish Creek House... Originality and creativity is what we strive for.
We've all heard that breakfast is the most important meal of the day.. Frankly I could eat breakfast foods morning noon and night! . With breakfast, we are replenishing our bodies from the night before and charging them for the day ahead. As an athlete (endurance runner and now horse rider), how we will perform during the day is affected by what we eat in the morning. Yet, breakfast tends to be rushed and routine—more so than any other meal. Here are dozens of ideas to help you build better breakfasts.
Eggs don’t have to be boring
Wander through an egg cookbook for a bunch of ideas and of course the internet on what you can cook with eggs.
Here are some of the egg dishes that we enjoy. (They’re more techniques than recipes but you’ll get the idea.)
• Scrambled eggs in all their variations. Try Spanish scrambled eggs with leftover rice, salsa, and sautéed onions, peppers, and chilies. Or the old standby—cheddar scrambled eggs. Try adding a can of Mexi-corn to scrambled eggs. We like Chinese vegetables added to our scrambled eggs. If you like it, consider it with scrambled eggs.
• Omelets in their variations. Think about the omelets on the menu at your favorite restaurant. Whatever you can do with scrambled eggs, you can do with an omelet. An omelet is a great way to showcase your favorite vegetables.
• Quiches. Think of quiches as savory pies instead of sweet pies. Check out a few recipes for ideas and then experiment with the ingredients that you like. Many quiches are loaded with cheese but they don’t have to be. Load them with your favorite veggies instead.
Here’s how to make a quiche practical for a busy morning: Make the crust and line the pie pan the night before or purchase a pie shell from the grocer. Mix the filling the night before and stick it in the refrigerator. When you get up, load the pie shell with the filling and set your quiche to bake. By the time the kids are ready for school, the quiche will be ready to come from the oven.
• French toast. French toast can be quick and easy. For variety, try different breads. We love hearty breads like multi-grain bread for French toast and fruit-filled bread like raisin bread. French toast is a great way to use up day old bread. Or try stuffed French toast. Here’s a recipe for Blueberry Stuffed French Toast. Consider this a technique and not a recipe. Load your French toast with different fruits or your favorite preserves. Try mixing nuts, raisins, or preserves into the cream cheese filling.
• Breakfast burritos. Anything that you can do with scrambled eggs, you can wrap in a tortilla. We like veggies and cheddar loaded with salsa.
Consider breads for breakfast
Biscuits, scones, muffins, English muffins, bagels, pancakes, toast, and quick breads all make great breakfast fodder.
The argument is that breads take too long and are too much trouble for breakfast. They don’t have to be. Consider these alternatives:
• Toast. Try cheese or thinly sliced deli meat on toast as a quick and easy breakfast. Spread a little cream cheese on your toast and top it with a slice of fruit or jam. We like peanut butter or peanut butter and cream cheese on toast. Or try peanut butter and raisins or peanut butter and sliced bananas on toast.
• Pancakes. Pancakes are quick and easy especially if you are using a mix. The grocery store mixes tend to be made almost entirely of flour but you can bolster the mix by adding dry milk or buttermilk powder. Or you can make your own mix.
• Muffins. You don’t have to invest a lot of morning time in muffins. Consider refrigerator muffins. Mix up a batch of refrigerator muffins on Sunday evening, keep the batter in the refrigerator, and you’ll have fresh muffins for most of the week. Simply load up the muffin tins when you get up and let them bake while you herd your family through their morning routines.
Of course, don’t forget the bread machine
What could be better than fresh bread for breakfast? Most bread machines have timers. You can program these machines to turn out perfect bread just in time for breakfast. Consider some of the fruit and nut selections for breakfast breads. Fresh Cranberry Nut Bread with whipped cream cheese butter or California Raisin Bread with strawberry butter sounds pretty scrumptious.
Eat what you like
Remember our college days when we thought pizza was a staple and cold pizza was the breakfast of champions? I’m not ready to go back to those days but a salad or a sandwich sounds passable in the morning. The point is, if you like it, try it for breakfast. Who said we have to classify foods into breakfast, lunch, and dinner?
Take a second look at hot and cold cereal
Hot cereal is quick and easy and doesn’t have to be boring. Try spiking your hot cereal with dried fruit, nuts, or coconut. (Dried pineapple, coconut, and raisins is a combination we love.) You can even make it in the microwave. Mix the goodies, the cereal, and a touch of salt in a bowl. Add water and nuke it for about three minutes. Presto—instant hot cereal. (With microwaving cereal so easy, we don’t understand how the cereal conglomerates manage to sell any of those little packets.) We also have our own E-Z granola recipe here .
We've all heard that breakfast is the most important meal of the day.. Frankly I could eat breakfast foods morning noon and night! . With breakfast, we are replenishing our bodies from the night before and charging them for the day ahead. As an athlete (endurance runner and now horse rider), how we will perform during the day is affected by what we eat in the morning. Yet, breakfast tends to be rushed and routine—more so than any other meal. Here are dozens of ideas to help you build better breakfasts.
Eggs don’t have to be boring

Wander through an egg cookbook for a bunch of ideas and of course the internet on what you can cook with eggs.
Here are some of the egg dishes that we enjoy. (They’re more techniques than recipes but you’ll get the idea.)
• Scrambled eggs in all their variations. Try Spanish scrambled eggs with leftover rice, salsa, and sautéed onions, peppers, and chilies. Or the old standby—cheddar scrambled eggs. Try adding a can of Mexi-corn to scrambled eggs. We like Chinese vegetables added to our scrambled eggs. If you like it, consider it with scrambled eggs.
• Omelets in their variations. Think about the omelets on the menu at your favorite restaurant. Whatever you can do with scrambled eggs, you can do with an omelet. An omelet is a great way to showcase your favorite vegetables.
• Quiches. Think of quiches as savory pies instead of sweet pies. Check out a few recipes for ideas and then experiment with the ingredients that you like. Many quiches are loaded with cheese but they don’t have to be. Load them with your favorite veggies instead.

Here’s how to make a quiche practical for a busy morning: Make the crust and line the pie pan the night before or purchase a pie shell from the grocer. Mix the filling the night before and stick it in the refrigerator. When you get up, load the pie shell with the filling and set your quiche to bake. By the time the kids are ready for school, the quiche will be ready to come from the oven.
• French toast. French toast can be quick and easy. For variety, try different breads. We love hearty breads like multi-grain bread for French toast and fruit-filled bread like raisin bread. French toast is a great way to use up day old bread. Or try stuffed French toast. Here’s a recipe for Blueberry Stuffed French Toast. Consider this a technique and not a recipe. Load your French toast with different fruits or your favorite preserves. Try mixing nuts, raisins, or preserves into the cream cheese filling.
• Breakfast burritos. Anything that you can do with scrambled eggs, you can wrap in a tortilla. We like veggies and cheddar loaded with salsa.
Consider breads for breakfast
Biscuits, scones, muffins, English muffins, bagels, pancakes, toast, and quick breads all make great breakfast fodder.
The argument is that breads take too long and are too much trouble for breakfast. They don’t have to be. Consider these alternatives:
• Toast. Try cheese or thinly sliced deli meat on toast as a quick and easy breakfast. Spread a little cream cheese on your toast and top it with a slice of fruit or jam. We like peanut butter or peanut butter and cream cheese on toast. Or try peanut butter and raisins or peanut butter and sliced bananas on toast.
• Pancakes. Pancakes are quick and easy especially if you are using a mix. The grocery store mixes tend to be made almost entirely of flour but you can bolster the mix by adding dry milk or buttermilk powder. Or you can make your own mix.

• Muffins. You don’t have to invest a lot of morning time in muffins. Consider refrigerator muffins. Mix up a batch of refrigerator muffins on Sunday evening, keep the batter in the refrigerator, and you’ll have fresh muffins for most of the week. Simply load up the muffin tins when you get up and let them bake while you herd your family through their morning routines.
Of course, don’t forget the bread machine
What could be better than fresh bread for breakfast? Most bread machines have timers. You can program these machines to turn out perfect bread just in time for breakfast. Consider some of the fruit and nut selections for breakfast breads. Fresh Cranberry Nut Bread with whipped cream cheese butter or California Raisin Bread with strawberry butter sounds pretty scrumptious.
Eat what you like
Remember our college days when we thought pizza was a staple and cold pizza was the breakfast of champions? I’m not ready to go back to those days but a salad or a sandwich sounds passable in the morning. The point is, if you like it, try it for breakfast. Who said we have to classify foods into breakfast, lunch, and dinner?
Take a second look at hot and cold cereal
Hot cereal is quick and easy and doesn’t have to be boring. Try spiking your hot cereal with dried fruit, nuts, or coconut. (Dried pineapple, coconut, and raisins is a combination we love.) You can even make it in the microwave. Mix the goodies, the cereal, and a touch of salt in a bowl. Add water and nuke it for about three minutes. Presto—instant hot cereal. (With microwaving cereal so easy, we don’t understand how the cereal conglomerates manage to sell any of those little packets.) We also have our own E-Z granola recipe here .
Bread in the Woods
We really like fresh bread while we’re camping. There is something about bread products that just seems especially good in the woods. Maybe it’s the fresh air; maybe it’s the appetites that we work up in the woods. To paraphrase from the Swiss translation, "bread is not hard, but no bread is hard"... How true
When we talk about bread in the woods, two thoughts seem to flash through folk’s minds: “Hey, I can barely handle yeast in the kitchen,” and “Yeah, but I’m a tent camper. I can’t bake in the woods.” Never fear. This article will help.
If you can barely handle yeast in the kitchen, maybe yeast in the campground isn’t a great idea. But then, yeast is not temperamental to anything but temperature. If you solve the temperature problems, yeast in the campground is no more difficult than yeast in the kitchen. You need warm enough water to get the yeasty critters growing. Most recipes are going to ask for water in the 105 to 110 degree range. Unless you have a practiced finger, bring a thermometer.
Now you’ve got to keep the yeasty critters growing. That involves temperature too. Instead of covering your dough with plastic wrap, place the dough, bowl and all, in a large food-safe plastic bag. It’ll keep the surface of the dough from drying out, the drafts away from the dough, and you’ll have a little mini greenhouse. If you have some sun, you can probably get the dough warm enough for the yeast to work. Once at 11,000 feet in Montana with a youth group, we moved a tent into the brunt of the sun to absorb the afternoon rays and create enough heat to make the dough rise.
Steamed breads are so versatile. We love the outdoors and are always looking for interesting and different foods that we can cook while camping and steamed breads can be cooked as you lounge around the campfire. They make wonderful treats at home. And they make great emergency fare since you don't need an oven or even a range to cook these breads.
We put the following recipe together for a group of visiting hunters enroute to the Anaconda Pintlers. We started it cooking next to the morning fire and by the time breakfast was over and the dishes were done, the bread was ready. It was a little rich for morning food--more like a cake than a bread--but these backpackers didn't seem to mind and it certainly turned out good enough to be a treat at home.
Apricot-Date Nut Bread with Caramel Sauce
11/2 cups all-purpose flour
1/2 cup sugar
1 teaspoon baking soda
1/4 teaspoon salt
3/4 cup apricot nectar
2 cups chopped dates
1/2 cup chopped Brazil nuts
Caramel Sauce
3 tablespoons butter
1/2 cup packed brown sugar
1 tablespoon cornstarch
1/2 cup water
1/3 cup dry milk
1/2 teaspoon vanilla
In a medium bowl, combine the dry ingredients. (If you are taking this camping, combine these ingredients in a plastic bag before leaving.)
Stir in the juice until just combined. (An individual serving-sized can of apricot nectar is just about the right size.) Stir in the dates and nuts. (If you prefer, you can substitute raisins, dried apricots, or cranberries for the dates. Of course, you can use your favorite nuts.)
Pack the dough into a well-greased large can or other cooking container. Cover the top with heavy foil and tie it securely with string.
Place the can on a rack in a large pan or kettle. (At camp, a few clean pebbles work as well as a rack.) Fill the pan with water and set it to simmer. Let the pan simmer for two hours, adding water as necessary. When done, invert the bread onto a plate and slice to serve.
For the caramel sauce, melt the butter in a saucepan. Add the sugar and cornstarch and stir. Then stir the water and dry milk together and add to the pan. Cook and stir until thick and bubbly, about five minutes at low heat. Add the vanilla. Serve hot or cold over the nut bread. (For camping, put the dry ingredients in a plastic bag adding the vanilla to the brown sugar. Melt the butter, add the dry ingredients and then the water.)
You can also make some wonderful steamed breads around a campfire or on a cook stove. Many of these are sweetbreads, maybe even dessert breads, but they can be very good—good enough to make at home.
And of course, you can always rely on pancakes. In fact, pancakes may be one of the most versatile of camping foods. It works on the trail on a backpacking trip, in an RV, and everything in between. You can make them sweet or savory. You can top them with syrups or sauces. You can even stuff them, roll them, and eat them as a burrito.
A Schoolin' in Scones
Ah, there's nothing like a tender, steaming scone in the morning. (Pronounced "skawn" like "fawn" or "scone" like "tone" -Webster says either is okay.) They're quick, they're easy, and with a few tips, they are absolutely delectable. Ever since my first trip to England, the quest for the perfect scone continues Here at the B&B, they are great "appetizer course" while guests are waiting for us to whip up the breakfast menu du jour or of course mid afternoon hungries
Scones are probably the easiest and quickest of breads. Once you get the ingredients assembled, most recipes only require fifteen minutes of prep time and another fifteen minutes or so of baking time. A mix is even quicker.
But there are some keys to making those flakey, tender scones that you've been dreaming about.
Key #1: Use the right flour. Use a soft, low protein flour-we use a quality pastry flour. You want soft, tender scones and too much protein leads to too much gluten which makes your scones chewy.
Key #2: Keep your ingredients cold. Temperature is critical to buttery, flakey scones. Start with very cold butter-it should chip when you cut it into chunks and your liquids should be ice cold. Before you start, measure your milk or water and put it in the freezer for ten minutes. Consider chilling your mixing bowl before mixing.
Why do your ingredients need to be cold? The objective is to keep the butter a solid and not let it melt into a liquid. If your dough is kept cold, it will have little bits of dispersed butter. In the heat of the oven, that butter melts into the dough but leaves pockets and layers in the scones.
Work with the dough quickly to keep it cool.
Key #3: Don't work your dough too much. Kneading converts the protein to gluten. Mix only until the ingredients come together into a combined mass.
Key #4: Use a folding technique. For flakey, layered scones, use a folding technique. Roll the dough out to about 3/8-inch thick. Fold the dough in half and in half again and again. Roll the dough out to about 3/4-inch thick before cutting the scones.
Key #5: Use a ruler. If you would like nice, neat scones, use a ruler both as a straightedge to cut against and to measure equally-sized scones.
Key #6: Leave the cut edges of the scones alone. Patting the edges with your fingers melds the edges so that the scone will not rise as nicely or have a flakey, layered structure.
Key #7: Don't over-bake your scones. Over-baking for even a minute or two will dry your scones out. As soon as the edges begin to turn brown, remove them from the oven. Immediately, place the scones on a wire rack-the hot pan will continue to dry the scones.
More Tips
* Scones can be frozen for up to three months. Reheat them at 300 degrees for 10 to 15 minutes. Probe the inside of the scone to make sure that it is warm.
* Scones are best fresh out of the oven. Recipes with more butter keep fresh longer.
* For the best shape, don't roll your dough thinner than 1/2-inch.
* Scones will rise to double their unbaked height in the oven. If they are properly cut, they will spread very little so you can place them close together on the baking sheet.
MONTANA MORNIN' SCONES
Makes 6-8 large triangular scones Montana Mornin' scones
3 cups AP flour
1/3 cup sugar
2½ tsps. baking powder
½ tsp baking soda
¾ tsp salt
6 ozs. cold butter, cut into small pieces
½ cup Nestle Coco Evap milk + ½ cup whole milk mixed with 1 T vinegar or
1 cup buttermilk
Preheat oven to 425°F. Line a baking sheet with parchment paper.
In a medium bowl, stir together the flour, sugar, baking powder, baking soda, and salt. Add the cold butter pieces and using your fingers (preferred method), a pastry blender, or two knives, work the butter into the flour until the mixture resembles coarse cornmeal. Don’t worry about large pieces of butter remaining – they’ll add to the scones’ flakiness.
Slowly pour in 1 cup buttermilk – careful, you might not need all the liquid. The resulting dough will be soft and just barely hold together. Transfer the dough onto a floured surface, a Silpat mat, or onto the prepared baking sheet. Knead the dough gently until it holds together – a dozen turns should do. Use a soft hand or else the scones will be tough.
Using a rolling pin or your hands, roll out/flatten the dough into a circle of the desired thickness. With a bench scraper or long knife, cut the circle into 6-8 triangles. At this point, you can brush the scones with some melted butter and/or drizzle them with some sugar.
Bake the scones for 12-17 minutes – baking time will depend on how big and thick your scones are. The scones are done when they’re lightly golden on top and are firm when pressed. Let cool briefly and serve warm.
Cinnamon Bun Scones
I happened upon this recipe as I was looking for something quick and easy for Sunday breakfast guests. They were wanting cinnamon rolls, but, alas, I couldn’t turn back time and prepare them Saturday night. Being a cinnamon freak myself, do yourself a favor. Make these as soon as is humanly possible. Seriously, they are that good. The oats and cinnamon and vanilla and pecans all just come together into one of the best things I’ve had for breakfast in a long time and the guests nabbed the leftovers .. as well as a copy of the recipe.

2 cups all-purpose flour
1 cup Quaker® Oats, quick or old fashioned, uncooked
1/4 cup + 2 tablespoons granulated sugar
1 tablespoon baking powder
1/4 teaspoon salt
8 tablespoons (1 stick) butter or margarine, chilled and cut into pieces
3/4 cup milk
1 egg, lightly beaten
1 teaspoon vanilla
1/2 cup toasted chopped pecans
2 teaspoons ground cinnamon glaze
3/4 cup powdered sugar
3 teaspoons orange juice or milk
Preparation Steps
Heat oven to 425°F. Spray cookie sheet with cooking spray.
In large bowl, combine flour, oats, 1/4 cup granulated sugar, baking powder and salt; mix well. Cut in butter with pastry blender or two knives until mixture resembles coarse crumbs. In small bowl, combine milk, egg and vanilla; blend well. Add to dry ingredients all at once; stir with fork or rubber spatula until dry ingredients are moistened. In small bowl, combine remaining 2 tablespoons granulated sugar with the pecans and cinnamon; mix well. Sprinkle evenly over dough in bowl; gently stir batter to swirl in cinnamon mixture (Do not blend completely.) Drop dough by 1/4 cupfuls 2 inches apart on cookie sheet.
Bake 11 to 13 minutes or until golden brown. Remove to wire rack; cool 5 minutes. In small bowl, combine powdered sugar and enough orange juice for desired consistency; mix until smooth. Drizzle over top of warm scones. Serve warm.
Scones are probably the easiest and quickest of breads. Once you get the ingredients assembled, most recipes only require fifteen minutes of prep time and another fifteen minutes or so of baking time. A mix is even quicker.
But there are some keys to making those flakey, tender scones that you've been dreaming about.
Key #1: Use the right flour. Use a soft, low protein flour-we use a quality pastry flour. You want soft, tender scones and too much protein leads to too much gluten which makes your scones chewy.
Key #2: Keep your ingredients cold. Temperature is critical to buttery, flakey scones. Start with very cold butter-it should chip when you cut it into chunks and your liquids should be ice cold. Before you start, measure your milk or water and put it in the freezer for ten minutes. Consider chilling your mixing bowl before mixing.
Why do your ingredients need to be cold? The objective is to keep the butter a solid and not let it melt into a liquid. If your dough is kept cold, it will have little bits of dispersed butter. In the heat of the oven, that butter melts into the dough but leaves pockets and layers in the scones.
Work with the dough quickly to keep it cool.
Key #3: Don't work your dough too much. Kneading converts the protein to gluten. Mix only until the ingredients come together into a combined mass.
Key #4: Use a folding technique. For flakey, layered scones, use a folding technique. Roll the dough out to about 3/8-inch thick. Fold the dough in half and in half again and again. Roll the dough out to about 3/4-inch thick before cutting the scones.
Key #5: Use a ruler. If you would like nice, neat scones, use a ruler both as a straightedge to cut against and to measure equally-sized scones.
Key #6: Leave the cut edges of the scones alone. Patting the edges with your fingers melds the edges so that the scone will not rise as nicely or have a flakey, layered structure.
Key #7: Don't over-bake your scones. Over-baking for even a minute or two will dry your scones out. As soon as the edges begin to turn brown, remove them from the oven. Immediately, place the scones on a wire rack-the hot pan will continue to dry the scones.
More Tips
* Scones can be frozen for up to three months. Reheat them at 300 degrees for 10 to 15 minutes. Probe the inside of the scone to make sure that it is warm.
* Scones are best fresh out of the oven. Recipes with more butter keep fresh longer.
* For the best shape, don't roll your dough thinner than 1/2-inch.
* Scones will rise to double their unbaked height in the oven. If they are properly cut, they will spread very little so you can place them close together on the baking sheet.
MONTANA MORNIN' SCONES

Makes 6-8 large triangular scones Montana Mornin' scones
3 cups AP flour
1/3 cup sugar
2½ tsps. baking powder
½ tsp baking soda
¾ tsp salt
6 ozs. cold butter, cut into small pieces
½ cup Nestle Coco Evap milk + ½ cup whole milk mixed with 1 T vinegar or
1 cup buttermilk
Preheat oven to 425°F. Line a baking sheet with parchment paper.
In a medium bowl, stir together the flour, sugar, baking powder, baking soda, and salt. Add the cold butter pieces and using your fingers (preferred method), a pastry blender, or two knives, work the butter into the flour until the mixture resembles coarse cornmeal. Don’t worry about large pieces of butter remaining – they’ll add to the scones’ flakiness.
Slowly pour in 1 cup buttermilk – careful, you might not need all the liquid. The resulting dough will be soft and just barely hold together. Transfer the dough onto a floured surface, a Silpat mat, or onto the prepared baking sheet. Knead the dough gently until it holds together – a dozen turns should do. Use a soft hand or else the scones will be tough.
Using a rolling pin or your hands, roll out/flatten the dough into a circle of the desired thickness. With a bench scraper or long knife, cut the circle into 6-8 triangles. At this point, you can brush the scones with some melted butter and/or drizzle them with some sugar.
Bake the scones for 12-17 minutes – baking time will depend on how big and thick your scones are. The scones are done when they’re lightly golden on top and are firm when pressed. Let cool briefly and serve warm.
Cinnamon Bun Scones
I happened upon this recipe as I was looking for something quick and easy for Sunday breakfast guests. They were wanting cinnamon rolls, but, alas, I couldn’t turn back time and prepare them Saturday night. Being a cinnamon freak myself, do yourself a favor. Make these as soon as is humanly possible. Seriously, they are that good. The oats and cinnamon and vanilla and pecans all just come together into one of the best things I’ve had for breakfast in a long time and the guests nabbed the leftovers .. as well as a copy of the recipe.

2 cups all-purpose flour
1 cup Quaker® Oats, quick or old fashioned, uncooked
1/4 cup + 2 tablespoons granulated sugar
1 tablespoon baking powder
1/4 teaspoon salt
8 tablespoons (1 stick) butter or margarine, chilled and cut into pieces
3/4 cup milk
1 egg, lightly beaten
1 teaspoon vanilla
1/2 cup toasted chopped pecans
2 teaspoons ground cinnamon glaze
3/4 cup powdered sugar
3 teaspoons orange juice or milk
Preparation Steps
Heat oven to 425°F. Spray cookie sheet with cooking spray.
In large bowl, combine flour, oats, 1/4 cup granulated sugar, baking powder and salt; mix well. Cut in butter with pastry blender or two knives until mixture resembles coarse crumbs. In small bowl, combine milk, egg and vanilla; blend well. Add to dry ingredients all at once; stir with fork or rubber spatula until dry ingredients are moistened. In small bowl, combine remaining 2 tablespoons granulated sugar with the pecans and cinnamon; mix well. Sprinkle evenly over dough in bowl; gently stir batter to swirl in cinnamon mixture (Do not blend completely.) Drop dough by 1/4 cupfuls 2 inches apart on cookie sheet.
Bake 11 to 13 minutes or until golden brown. Remove to wire rack; cool 5 minutes. In small bowl, combine powdered sugar and enough orange juice for desired consistency; mix until smooth. Drizzle over top of warm scones. Serve warm.
Morning is for Muffins
Ever since my New York days and managing a bakery on the upper east side, I've loved grainy muffins. Turns out so do our guests ... Here are some of our muffin madness for you to enjoy
Yes, we have more bananas..
Brunch. What a fabulously promising word, evocative of lazy Sunday mornings, which is what breakfast here at the Fish Creek House ends up being. Guests relaxing and deliciously carefree, to share the kind of simple and comforting food that makes you feel like a kid again. Runny eggs on toast. Bacon and potatoes. Blueberry pancakes. Puffy French toast.
We add banana pecan muffins to the menu and round that out with freshly squeezed orange juice, your choice of tea or coffee (free refills!) . Needless to say, we usually have leftover stuff to eat for about a week afterwards, but that's a clear benefit
I like them best fresh out of the oven (after the necessary cooling down), but of course can be reheated in the oven the next day as well.

- 1 C sugar
- 1 egg
- 1/2 C salted butter
- 2 ripe bananas
- 1/4 C milk
- 2 C all-purpose flour
- 1 tsp baking powder
- 1/2 tsp baking soda
- 1 C pecans, toasted and chopped
(Yields 18 small muffins.)
Preheat the oven to 180°C (360°F), and grease medium muffin tins (1.5'' or 4 cm in diameter) or line them with paper.
In a large mixing-bowl or in a food processor, cream together the sugar, the egg and the butter. In a separate bowl, mash together the bananas and milk. In another separate bowl, sift together flour, baking powder, and baking soda. Add the flour mixture to the butter mixture in three parts, alternating with banana-milk mixture in two parts, stirring by hand until just combined (don't overmix or your muffins will be a little dense). Stir in the pecans.
Pour the batter into the muffin tins and bake for 40 minutes, or until the muffins are nice and golden. Allow to cool for a few minutes then turn out on a rack to cool.
Healthy Cornbread Muffins
Ever since i left New York, i've been searching for the perfect "NY corn muffin". These come close
f you're not watching the calories, you'll get a moister muffin if you use 1/4 cup oil instead of the 1/4 cup yogurt + 1 tbsp oil called for below.
Recipe
1 cup cornmeal
1 cup ap flour
1 tsp baking soda
1 tsp baking powder
1 tsp salt
1/4 cup sugar
2 eggs
1 cup low fat buttermilk
1/4 cup yogurt
1 tbsp olive oil
Preheat oven to 400F. Grease a 12 cup muffin tin.
Whisk together cornmeal, flour, baking soda, baking powder, salt and sugar in a large bowl. Whisk together eggs, buttermilk, yogurt and oil. Pour buttermilk mixture into cornmeal mixture and stir until just combined. Fill each muffin cup 2/3 full with batter.
Bake for 15-18 minutes, until tester just comes out clean. Do not overbake!
Turn out to cool on a wire rack.
So I'm on a muffin jag here ... Guests love these in the bread basket and we let them take the extras (if there are any!) on the road
Pumpkin Muffins
2 large eggs
1/2 cup milk
6 T butter
1/2 cup brown sugar
1 cup canned pumpkin
1 1/2 cups Flour
2 T baking powder
1/2 tsp. salt
1/2 tsp. cinnamon
1/4 tsp. nutmeg
Preheat oven to 400. Beat the eggs, milk, brown sugar, butter and pumpkin. In another bowl mix the flour, baking powder, salt and spices. From the recipe: "Add the pumpkin mixture to the flour mixture and stir just enough to moisten and combine. The less you stir the muffins, the lighter and more tender they are. Lumps are okay! Pour the batter into greased muffin pans about 2/3 full and bake for 25 minutes until a toothpick inserted in center comes out clean." Makes 18 muffins.
Apple Pie Muffins
Another great use for apples that have lost their crunch is to make a batch of Apple Pie muffins. The recipe comes from Canadian Living's Best Muffins and More publication and are a hit every time I make them. They are moist, studded with apple chunks and topped off with a crunchy nut streusel.
2 1/4 cups all-purpose flour
1 1/2 cups packed brown sugar
1 tsp baking soda
1/2 tsp salt
1 egg
1 cup buttermilk
1/2 cup butter, melted
1 tsp vanilla
2 cups diced peeled apples
Topping:
1/2 cup packed brown sugar
1/2 cup chopped pecans
1/3 cup all-purpose flour
1 tsp cinnamon
2 tbsp butter, melted
Topping: In bowl, stir together brown sugar, pecans, flour and cinnamon. Drizzle with butter, tossing with fork. Set aside.
In large bowl, combine flour, sugar, baking soda and salt. Whisk together egg, buttermilk, butter and vanilla; pour over dry ingredients. Sprinkle with apples; stir just until dry ingredients are moistened.
Spoon into large greased or paper-lined muffin cups; sprinkle with topping. Bake in 375 F oven for about 25 minutes or until tops are firm to the touch. Makes 16 muffins.
These muffins can be enjoyed any time and can be frozen and eaten later. Try one warm with butter - they're great!
Just Dessert Party Oreo Muffins
To ring in the New Year, my sister-in -law Alise would hold her annual "just dessert party... Got these from her... Needless to say those "diet resolutions" started January 2.
The muffins came together nicely and I added an extra smidge of milk to get the batter a little softer. I would recommend leaving the cookie part in big chunks. Crumbs just dissolve and with the big chunks, the muffins stay black and white. The muffins, surprisngly, weren't very sweetand had a dense crumb. . They went over well with the kids and I just added melted white chocolate on top to decorate and give them some extra flavour.
Recipe
1 egg
1/2 cup milk
1/4 cup butter, melted
1 1/2 cups flour
1/2 cup granulated sugar
2 teaspoons baking powder
1/2 teaspoon salt
1/2 cup chocolate chips
1 cup Oreos, crushed
Preheat oven to 400 degrees F. Grease muffin tins.
Beat together the egg, milk and butter. Stir in the remaining ingredients except the Oreos. Fold in the Oreos; batter will be lumpy. Spoon into prepared muffin tins and bake for 15 to 20 minutes.
Yes, we have more bananas..
Brunch. What a fabulously promising word, evocative of lazy Sunday mornings, which is what breakfast here at the Fish Creek House ends up being. Guests relaxing and deliciously carefree, to share the kind of simple and comforting food that makes you feel like a kid again. Runny eggs on toast. Bacon and potatoes. Blueberry pancakes. Puffy French toast.
We add banana pecan muffins to the menu and round that out with freshly squeezed orange juice, your choice of tea or coffee (free refills!) . Needless to say, we usually have leftover stuff to eat for about a week afterwards, but that's a clear benefit
I like them best fresh out of the oven (after the necessary cooling down), but of course can be reheated in the oven the next day as well.

- 1 C sugar
- 1 egg
- 1/2 C salted butter
- 2 ripe bananas
- 1/4 C milk
- 2 C all-purpose flour
- 1 tsp baking powder
- 1/2 tsp baking soda
- 1 C pecans, toasted and chopped
(Yields 18 small muffins.)
Preheat the oven to 180°C (360°F), and grease medium muffin tins (1.5'' or 4 cm in diameter) or line them with paper.
In a large mixing-bowl or in a food processor, cream together the sugar, the egg and the butter. In a separate bowl, mash together the bananas and milk. In another separate bowl, sift together flour, baking powder, and baking soda. Add the flour mixture to the butter mixture in three parts, alternating with banana-milk mixture in two parts, stirring by hand until just combined (don't overmix or your muffins will be a little dense). Stir in the pecans.
Pour the batter into the muffin tins and bake for 40 minutes, or until the muffins are nice and golden. Allow to cool for a few minutes then turn out on a rack to cool.
Healthy Cornbread Muffins

Ever since i left New York, i've been searching for the perfect "NY corn muffin". These come close
f you're not watching the calories, you'll get a moister muffin if you use 1/4 cup oil instead of the 1/4 cup yogurt + 1 tbsp oil called for below.
Recipe
1 cup cornmeal
1 cup ap flour
1 tsp baking soda
1 tsp baking powder
1 tsp salt
1/4 cup sugar
2 eggs
1 cup low fat buttermilk
1/4 cup yogurt
1 tbsp olive oil
Preheat oven to 400F. Grease a 12 cup muffin tin.
Whisk together cornmeal, flour, baking soda, baking powder, salt and sugar in a large bowl. Whisk together eggs, buttermilk, yogurt and oil. Pour buttermilk mixture into cornmeal mixture and stir until just combined. Fill each muffin cup 2/3 full with batter.
Bake for 15-18 minutes, until tester just comes out clean. Do not overbake!
Turn out to cool on a wire rack.
So I'm on a muffin jag here ... Guests love these in the bread basket and we let them take the extras (if there are any!) on the road
Pumpkin Muffins

2 large eggs
1/2 cup milk
6 T butter
1/2 cup brown sugar
1 cup canned pumpkin
1 1/2 cups Flour
2 T baking powder
1/2 tsp. salt
1/2 tsp. cinnamon
1/4 tsp. nutmeg
Preheat oven to 400. Beat the eggs, milk, brown sugar, butter and pumpkin. In another bowl mix the flour, baking powder, salt and spices. From the recipe: "Add the pumpkin mixture to the flour mixture and stir just enough to moisten and combine. The less you stir the muffins, the lighter and more tender they are. Lumps are okay! Pour the batter into greased muffin pans about 2/3 full and bake for 25 minutes until a toothpick inserted in center comes out clean." Makes 18 muffins.
Apple Pie Muffins

Another great use for apples that have lost their crunch is to make a batch of Apple Pie muffins. The recipe comes from Canadian Living's Best Muffins and More publication and are a hit every time I make them. They are moist, studded with apple chunks and topped off with a crunchy nut streusel.
2 1/4 cups all-purpose flour
1 1/2 cups packed brown sugar
1 tsp baking soda
1/2 tsp salt
1 egg
1 cup buttermilk
1/2 cup butter, melted
1 tsp vanilla
2 cups diced peeled apples
Topping:
1/2 cup packed brown sugar
1/2 cup chopped pecans
1/3 cup all-purpose flour
1 tsp cinnamon
2 tbsp butter, melted
Topping: In bowl, stir together brown sugar, pecans, flour and cinnamon. Drizzle with butter, tossing with fork. Set aside.
In large bowl, combine flour, sugar, baking soda and salt. Whisk together egg, buttermilk, butter and vanilla; pour over dry ingredients. Sprinkle with apples; stir just until dry ingredients are moistened.
Spoon into large greased or paper-lined muffin cups; sprinkle with topping. Bake in 375 F oven for about 25 minutes or until tops are firm to the touch. Makes 16 muffins.
These muffins can be enjoyed any time and can be frozen and eaten later. Try one warm with butter - they're great!
Just Dessert Party Oreo Muffins
To ring in the New Year, my sister-in -law Alise would hold her annual "just dessert party... Got these from her... Needless to say those "diet resolutions" started January 2.
The muffins came together nicely and I added an extra smidge of milk to get the batter a little softer. I would recommend leaving the cookie part in big chunks. Crumbs just dissolve and with the big chunks, the muffins stay black and white. The muffins, surprisngly, weren't very sweetand had a dense crumb. . They went over well with the kids and I just added melted white chocolate on top to decorate and give them some extra flavour.
Recipe

1 egg
1/2 cup milk
1/4 cup butter, melted
1 1/2 cups flour
1/2 cup granulated sugar
2 teaspoons baking powder
1/2 teaspoon salt
1/2 cup chocolate chips
1 cup Oreos, crushed
Preheat oven to 400 degrees F. Grease muffin tins.
Beat together the egg, milk and butter. Stir in the remaining ingredients except the Oreos. Fold in the Oreos; batter will be lumpy. Spoon into prepared muffin tins and bake for 15 to 20 minutes.
Another Login on Logs
A LOG CABIN IS IRRESISTIBLE. IT expresses the romance of home--that archetypal feeling of warmth, protection, and permanence--like no other structure. It fuels the imagination, making you dream of sinking into your favorite easy chair as firelight dances across log walls the color of honey and a coyote howls in the distance. . A log cabin comeback is under way. Owning a log home has long been defined as living and loving a certain lifestyle. Whether the log home is of traditional design and located on a remote hillside or a totally contemporary model in a resort community, the owners are often independent spirits who enjoy the attention a unique home offers. They love being surrounded by the ambience of natural wood and the feeling of rootedness these sturdy homes imply. Their substantial horizontal silhouettes and sturdily stacked corners seem to stud almost every newly subdivided ranch, contrasting vividly with the thinner, wood-frame construction of conventional houses. Logs embody an alpine aesthetic.
"When we first started our log home renovation with an eye towards opening up the Fish Creek House Bed and Breakfast, , we found that altho we were the hands-on types, still being in California we were very willing to turn the process over to the log home builder, John Benedict once these aspects have been determined. They want their particular log home to look like those they've seen in the log home magazines, but they don't have the time or inclination to make that look happen.
Log home furniture might feature wood frames and intriguing upholstery patterns and colors. The beds and chairs made of logs built from the local Amish community. The lighting fixtures, including table lamps and chandeliers, can be made from antlers or have rustic metal shades featuring cut-out silhouettes. Everything from carved front doors and mantles to log staircases and window frames -- it all comes together for that total log home feel. We were thrilled to discover the variety of furniture and specialty items available to help visualize what the final product would look like.
CHOOSING YOUR WOOD SPECIES
One of the first questions we had to answer was "What kind of wood is the best to use?" There is no one correct answer to that question because quality log homes can be built successfully from many different wood species. Wood has many different [characteristics loghomes/wood/index.html]. Which species is best often depends on which of these characteristics you consider to be the most important.
Characteristics of Wood Species
The characteristics of wood that generally concern log home buyers are appearance, resistance to decay, insulation value, cost and stability--that is, how much shrinking, twisting, warping and checking the wood is likely to experience over the years.
Log home producers share consumers' concerns about these characteristics. They also have to take into account other factors when determining which wood to use. These additional considerations include the availability of the particular species in commercial quantities and the ease with which the wood can be cut and shaped into building logs.
Given all the variables that affect the selection of wood species, you can understand why it is so difficult to single out one species as "the best." A good starting point in evaluating wood is to review the characteristics that both consumers and producers most frequently mention as important.
Appearance. The appearance of wood on the exterior of a log home will change with time due to the effects of weathering. Application of certain wood preservatives also can cause changes in the appearance of wood. The best wood for you in terms of appearance will depend solely on your personal taste.
Decay Resistance. Although the natural decay resistance of various species of wood differs considerably, most producers strongly recommend treating the exterior of log homes with a wood preservative, regardless of the wood's natural decay resistance. While natural decay resistance is definitely a plus, it should not unduly influence your choice of a particular wood species.
R-Value. The following listings provide the R-value of each species of wood. Note, however, that the difference between the species with the highest and lowest R-values is only fractional. As the section on [energy efficiency loghomes/engineering/energy.html] points out, R-value is only one consideration in evaluating the energy efficiency of a log home.
Stability. The tendency of a wood to shrink, twist, warp and check is a valid concern for both consumers and producers. Fortunately, it also is a factor that can be controlled by various producers through good materials-handling techniques. As an example, a wood that tends to shrink can be kiln-dried or air-dried, thus controlling this characteristic. Also, through careful grading of the wood, those logs with an inherent tendency to twist or warp can be identified and rejected. Therefore, the instability of a particular species can be overcome in many cases through good materials selection and management procedures.
Cost. The price paid for different wood species can be significant. Some wood, such as Northern white cedar, is expensive because it is a slow-growing species and is difficult to harvest in commercial quantities. Other wood, such as Southern yellow pine, is less expensive because it is a fast-growing species that is sufficiently available in commercial quantities
Interior Log Home
We have saddle-notch corners (also known as saddle-cope or round-notch), a traditional form favored by handcrafters, get their name from the saddle-shaped notch cut into the bottom of each round log. The notch on the top log straddles the log coming from the perpendicular wall. Both logs extend past the corner. The op posing walls of a saddle-notch corner sys tem start with a half log to ensure the logs do not butt into each other. Energy efficiency is a must for any home. Logs are a natural reservoir for heat energy. To enhance this natural thermal mass efficiency, each log is coped using a Swedish cope. The radius of this cope is slightly smaller than the log diameter to maintain a uniform fit along the length of each log as the logs settle.
Who needs it? Many of the hand-crafted log homes not built in a scribe-fit style are referred to as chinkers or chink style log homes. Several milled log manufacturers also offer log packages that require chinking. These are homes that are purposely built leaving gaps between the courses of logs. The gaps are usually created by inserting small spacer blocks that help hold the logs apart. At the corners the logs are held apart by the notches (usually round or dovetailed notches). When the log shell is erected at your site generally a backer rod (or equivalent) is pushed between the courses of logs and then a chinking compound is applied on the interior and exterior.
THE TWO DIFFERENT METHODS OF log construction are chinked, the more common, and scribed. The chinked approach--which refers to the material used to fill the gaps between the horizontally laid logs--is especially popular now because a synthetic chink has been developed. Previously, chink was a cement-based material that cracked easily and had to be continually replaced. Synthetic chink, an acrylic latex combined with fine sand, first appeared in the late 1970s. The development of the synthetic has helped make log houses more practical, and thus more desirable.
What does chinking do? Quite simply, chinking stops air and moisture infiltration into your home. With the backer rod, it helps insulate your home as well.
What is chinking made of? Traditionally, chinking was a mixture of clay, lime, and sand with variations based on what was locally available. Today we use an acrylic, elastic compound that adheres to the logs and can stretch and contract as the logs settle and move seasonally. Old fashioned chinking often pulls away from logs and cracks, allowing water and insects to enter the logs.
Chinking, (or caulking), can also be used to seal any gaps between logs and notches in scribe-fit style handcrafted and milled log packages that had "gapped" for whatever reason.
We then had our contractor stain both inside and outside, let dry (fortunately it was May here so that worked well )and then e also chinked both interior and exterior.
"When we first started our log home renovation with an eye towards opening up the Fish Creek House Bed and Breakfast, , we found that altho we were the hands-on types, still being in California we were very willing to turn the process over to the log home builder, John Benedict once these aspects have been determined. They want their particular log home to look like those they've seen in the log home magazines, but they don't have the time or inclination to make that look happen.
Log home furniture might feature wood frames and intriguing upholstery patterns and colors. The beds and chairs made of logs built from the local Amish community. The lighting fixtures, including table lamps and chandeliers, can be made from antlers or have rustic metal shades featuring cut-out silhouettes. Everything from carved front doors and mantles to log staircases and window frames -- it all comes together for that total log home feel. We were thrilled to discover the variety of furniture and specialty items available to help visualize what the final product would look like.
CHOOSING YOUR WOOD SPECIES
One of the first questions we had to answer was "What kind of wood is the best to use?" There is no one correct answer to that question because quality log homes can be built successfully from many different wood species. Wood has many different [characteristics loghomes/wood/index.html]. Which species is best often depends on which of these characteristics you consider to be the most important.
Characteristics of Wood Species
The characteristics of wood that generally concern log home buyers are appearance, resistance to decay, insulation value, cost and stability--that is, how much shrinking, twisting, warping and checking the wood is likely to experience over the years.
Log home producers share consumers' concerns about these characteristics. They also have to take into account other factors when determining which wood to use. These additional considerations include the availability of the particular species in commercial quantities and the ease with which the wood can be cut and shaped into building logs.
Given all the variables that affect the selection of wood species, you can understand why it is so difficult to single out one species as "the best." A good starting point in evaluating wood is to review the characteristics that both consumers and producers most frequently mention as important.
Appearance. The appearance of wood on the exterior of a log home will change with time due to the effects of weathering. Application of certain wood preservatives also can cause changes in the appearance of wood. The best wood for you in terms of appearance will depend solely on your personal taste.
Decay Resistance. Although the natural decay resistance of various species of wood differs considerably, most producers strongly recommend treating the exterior of log homes with a wood preservative, regardless of the wood's natural decay resistance. While natural decay resistance is definitely a plus, it should not unduly influence your choice of a particular wood species.
R-Value. The following listings provide the R-value of each species of wood. Note, however, that the difference between the species with the highest and lowest R-values is only fractional. As the section on [energy efficiency loghomes/engineering/energy.html] points out, R-value is only one consideration in evaluating the energy efficiency of a log home.
Stability. The tendency of a wood to shrink, twist, warp and check is a valid concern for both consumers and producers. Fortunately, it also is a factor that can be controlled by various producers through good materials-handling techniques. As an example, a wood that tends to shrink can be kiln-dried or air-dried, thus controlling this characteristic. Also, through careful grading of the wood, those logs with an inherent tendency to twist or warp can be identified and rejected. Therefore, the instability of a particular species can be overcome in many cases through good materials selection and management procedures.
Cost. The price paid for different wood species can be significant. Some wood, such as Northern white cedar, is expensive because it is a slow-growing species and is difficult to harvest in commercial quantities. Other wood, such as Southern yellow pine, is less expensive because it is a fast-growing species that is sufficiently available in commercial quantities
Interior Log Home
We have saddle-notch corners (also known as saddle-cope or round-notch), a traditional form favored by handcrafters, get their name from the saddle-shaped notch cut into the bottom of each round log. The notch on the top log straddles the log coming from the perpendicular wall. Both logs extend past the corner. The op posing walls of a saddle-notch corner sys tem start with a half log to ensure the logs do not butt into each other. Energy efficiency is a must for any home. Logs are a natural reservoir for heat energy. To enhance this natural thermal mass efficiency, each log is coped using a Swedish cope. The radius of this cope is slightly smaller than the log diameter to maintain a uniform fit along the length of each log as the logs settle.

Who needs it? Many of the hand-crafted log homes not built in a scribe-fit style are referred to as chinkers or chink style log homes. Several milled log manufacturers also offer log packages that require chinking. These are homes that are purposely built leaving gaps between the courses of logs. The gaps are usually created by inserting small spacer blocks that help hold the logs apart. At the corners the logs are held apart by the notches (usually round or dovetailed notches). When the log shell is erected at your site generally a backer rod (or equivalent) is pushed between the courses of logs and then a chinking compound is applied on the interior and exterior.
THE TWO DIFFERENT METHODS OF log construction are chinked, the more common, and scribed. The chinked approach--which refers to the material used to fill the gaps between the horizontally laid logs--is especially popular now because a synthetic chink has been developed. Previously, chink was a cement-based material that cracked easily and had to be continually replaced. Synthetic chink, an acrylic latex combined with fine sand, first appeared in the late 1970s. The development of the synthetic has helped make log houses more practical, and thus more desirable.
What does chinking do? Quite simply, chinking stops air and moisture infiltration into your home. With the backer rod, it helps insulate your home as well.
What is chinking made of? Traditionally, chinking was a mixture of clay, lime, and sand with variations based on what was locally available. Today we use an acrylic, elastic compound that adheres to the logs and can stretch and contract as the logs settle and move seasonally. Old fashioned chinking often pulls away from logs and cracks, allowing water and insects to enter the logs.
Chinking, (or caulking), can also be used to seal any gaps between logs and notches in scribe-fit style handcrafted and milled log packages that had "gapped" for whatever reason.
We then had our contractor stain both inside and outside, let dry (fortunately it was May here so that worked well )and then e also chinked both interior and exterior.
Virginia City - Get Out of Jail
Montana is a vast and varied state of mountains, canyons, river valleys, forests and caverns. It's the 4th largest state in the nation but with our popularion under 1 million, it's actually the sixth least-populated state. Ah... there is room to breathe and nowhere is the air fresher. Oh sure, there's history, good food, and a variety of places to stay, but the main attraction is the sheer beauty. It's a land where everything seems intensified, in super sharp focus, richer in color, more majestic, more peaceful, and somehow closer to the sky. One of the many reasons we located here
Happily for travelers who prefer to avoid crowds, there's plenty of elbow room. Montana may be the fourth largest state in area (145,550 square miles), but, at under a million people, it ranks 48th in population density.
Virginia City
We played hookey mid week since the past weekend was a house ful of guests to visit this much touted city n .Also, since the builder of the log home we call the Fish Creek House Bed and Breakfast, is based out of Virginia City, we decided to give this tour a go... especially so we could see it up close and in person . Great recommendation for guests
Virginia City was the birthplace of Montana and the cradle of much history for the state. Though it may be best known as the rough-and-ready mining camp where vigilantes organized to rid the country of road agents and murderers, it is important to our history for many other reasons as well.
Gold is the force which created Virginia City, Montana and which controlled its history and made it strategic during the Civil War. Virginia City was producing enough gold to win the Civil War for whoever could capture it.
We noticed on our map that the Continental Divide runs pretty well north and south between Helena and Butte. The Continental Divide is like the ridge on your roof, where the water flows down and away from the ridge to the two sides of your house. The Continental Divide separates the water shed of the east from the west so that if you pour a glass of water on the east side it runs into the Atlantic Ocean and if you pour the water on the west side it runs to the Pacific Ocean. The Continental Divide is west of Helena and goes south to east of Butte, but at Butte it does a west and then north hook, then over to Anaconda, then south like a well behaved Continental Divide should until it becomes the Idaho - Montana border. Then it stays on the border and goes northeast, then across the lower end of Yellowstone National Park. When Idaho and Montana became separate territories the dividing line (the present state border) was believed to be the Continental Divide. Your map will show you where the crazy Continental Divide really runs. North of Virginia City the Continental Divide runs east and west, then circles around and finally, south of Virginia City, it runs east and west again. Then you will go over the top and down into Virginia City, Montana, and are you in for a treat!
The very much alive ghost town, Virginia City, Montana, is frozen in time. It is a remarkably well preserved old west Victorian gold mining town just 20 miles west of Yellowstone National Park (90 miles by road). When the gold ran out, there was still enough left so that homes and businesses were occupied, but there was not enough wealth to remodel the buildings. So it froze, and now represents the whole Victorian era. It is a true and original Old West. It is a gem, held within an incredibly rich area of natural beauty, recreation and history. Adjacent to Virginia City is Nevada City, filled with buildings and artifacts that will impress you. For many years Virginia City, Montana was a Rebel town in Union territory.
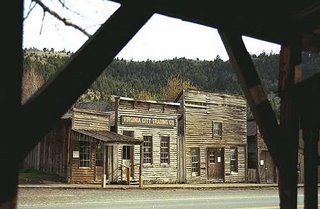 Back in 1865, merchants established the first businesses in Virginia City in wagons, tents, and wickiups (brush shacks) during the summer of 1863. Gold dust was the preferred medium of exchange, which was valued at $16 - $18/ounce.
 Of course what would a stop in Virginia City be without a stop at the brewery? And yes right next door is the opera house!!
In Old Town, we stopped off at Cousins Candy Shop The Virginia City shop has the original oak shelving and tin ceiling. Jars of the freshest candy are located in an old, covered chuck wagon pictured above. When we opened our shop in Old Town, we replicated the shelving and covered wagon exactly. Not only do we have great candy and a wonderful selection, Cousin's is just a fun place to visit with the entire family Of course the day wouldnt be complete without a stop at the Bale of Hay Saloon , an authentic wild west Saloon complete w/ Montana's best microbrews. Live music to to top off a great day
Happily for travelers who prefer to avoid crowds, there's plenty of elbow room. Montana may be the fourth largest state in area (145,550 square miles), but, at under a million people, it ranks 48th in population density.
Virginia City
We played hookey mid week since the past weekend was a house ful of guests to visit this much touted city n .Also, since the builder of the log home we call the Fish Creek House Bed and Breakfast, is based out of Virginia City, we decided to give this tour a go... especially so we could see it up close and in person . Great recommendation for guests
Virginia City was the birthplace of Montana and the cradle of much history for the state. Though it may be best known as the rough-and-ready mining camp where vigilantes organized to rid the country of road agents and murderers, it is important to our history for many other reasons as well.
Gold is the force which created Virginia City, Montana and which controlled its history and made it strategic during the Civil War. Virginia City was producing enough gold to win the Civil War for whoever could capture it.
We noticed on our map that the Continental Divide runs pretty well north and south between Helena and Butte. The Continental Divide is like the ridge on your roof, where the water flows down and away from the ridge to the two sides of your house. The Continental Divide separates the water shed of the east from the west so that if you pour a glass of water on the east side it runs into the Atlantic Ocean and if you pour the water on the west side it runs to the Pacific Ocean. The Continental Divide is west of Helena and goes south to east of Butte, but at Butte it does a west and then north hook, then over to Anaconda, then south like a well behaved Continental Divide should until it becomes the Idaho - Montana border. Then it stays on the border and goes northeast, then across the lower end of Yellowstone National Park. When Idaho and Montana became separate territories the dividing line (the present state border) was believed to be the Continental Divide. Your map will show you where the crazy Continental Divide really runs. North of Virginia City the Continental Divide runs east and west, then circles around and finally, south of Virginia City, it runs east and west again. Then you will go over the top and down into Virginia City, Montana, and are you in for a treat!
The very much alive ghost town, Virginia City, Montana, is frozen in time. It is a remarkably well preserved old west Victorian gold mining town just 20 miles west of Yellowstone National Park (90 miles by road). When the gold ran out, there was still enough left so that homes and businesses were occupied, but there was not enough wealth to remodel the buildings. So it froze, and now represents the whole Victorian era. It is a true and original Old West. It is a gem, held within an incredibly rich area of natural beauty, recreation and history. Adjacent to Virginia City is Nevada City, filled with buildings and artifacts that will impress you. For many years Virginia City, Montana was a Rebel town in Union territory.
 Back in 1865, merchants established the first businesses in Virginia City in wagons, tents, and wickiups (brush shacks) during the summer of 1863. Gold dust was the preferred medium of exchange, which was valued at $16 - $18/ounce.
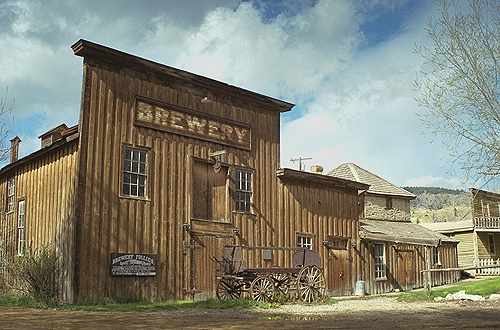 Of course what would a stop in Virginia City be without a stop at the brewery? And yes right next door is the opera house!!
In Old Town, we stopped off at Cousins Candy Shop The Virginia City shop has the original oak shelving and tin ceiling. Jars of the freshest candy are located in an old, covered chuck wagon pictured above. When we opened our shop in Old Town, we replicated the shelving and covered wagon exactly. Not only do we have great candy and a wonderful selection, Cousin's is just a fun place to visit with the entire family Of course the day wouldnt be complete without a stop at the Bale of Hay Saloon , an authentic wild west Saloon complete w/ Montana's best microbrews. Live music to to top off a great day
Abonați-vă la:
Postări (Atom)